Did you know that Pinterest is actually a search engine and not a social media platform? While it often gets lumped together with social platforms such as Twitter or Facebook, Pinterest is actually a place where people search for content – just like they would in Google or other search engines. The key to being successful in getting more traffic to your blog is to ensure you have the Pinterest SEO basics down. Here are some helpful Pinterest SEO tips to help you get both your Pinterest account and your blog optimized for success.

This post may contain affiliate links. You can read my full affiliate disclosure here.
Pinterest SEO Tips for Christian Bloggers
Pinterest is a smorgasbord of information on just about everything! While some may think it is only a place for finding great recipes or DIY projects, you can also find a wealth of information on things like business, parenting, and, yes, faith content! For Christian bloggers, Pinterest can be your number one source of organic traffic. But you need to understand how it works, how pins get found, and how to make your pins show up for others to see.
How to Get Found on Pinterest
- The Following Tab – Up at the top of your profile (on the right from desktop view), you can click on “followers” and you’ll see the pins of profiles that you follow. This is why it is important to gain genuine followers (organically) and not participate in follow for follow threads. This way, only those who are truly interested in your content will follow you and will then be seeing your pins (and hopefully engaging on them).
- The Hashtag Feed – Pinners can now search by hashtags in the Pinterest search box. By using hashtags that are most reflective of your content, you are able to be shown in the results feed when someone searches a particular one.
- The Smart Feed (Home Feed) – This is the feed that populates when you first get on Pinterest. The more “cool points” you earn with the Pinterest algorithm, the better chances you have of your pins showing up in that feed so pinners can see it.
- Search Results Feed – This is the feed that displays from a search query on Pinterest. The better optimized your pins are for a certain keyword, the better your chances of being shown in the results feed.
Now that you understand how pins are displayed to Pinterest users, your job is to get your pins showing up in those feeds! By understanding and implementing Pinterest SEO, you will start seeing your own pins show up in other pinners’ feeds.
Pinterest SEO Tips – Best Practices
The following are “best practices” when it comes to optimizing your account for Pinterest SEO. It is important that your Pinterest SEO strategy begins on your blog, but follow through to your actual Pinterest profile foundation. By laying a sound foundation for them, your pins will do much better in the long run. There are three major areas that affect Pinterest SEO:
- Having an optimized Pinterest Profile
- Having Optimized Pinnable Images
- Pinning Quality Content
1. Optimized Pinterest Profile
- Business Account – It is completely free to convert your personal account to a business account. This will enable you to review analytics for your pins.
- Rich Pins – Applying for rich pins is free and is really important. Rich pins provide much more detail on the pin image than non-rich pins. This will give pinners much more information about the content where the pin leads and Rich Pins are favored by the algorithm.
- Profile Name and Description – Your profile name and the small description need to include the main keywords that you want to be associated with for your profile.
- Board Titles – Your board titles should be terms people might actually search for when looking for the kind of content they contain.
- Board Descriptions – Your board descriptions should be keyword-rich – complete sentences. Do not simply fill it with hashtags or keywords separated by commas.
2. Optimized Pinnable Images
There are several components to creating an optimized “Pinterest-worthy” image. All of these Pinterest SEO tips will help you get more “cool points” from the algorithm so your pins will be shown more in the different feeds.
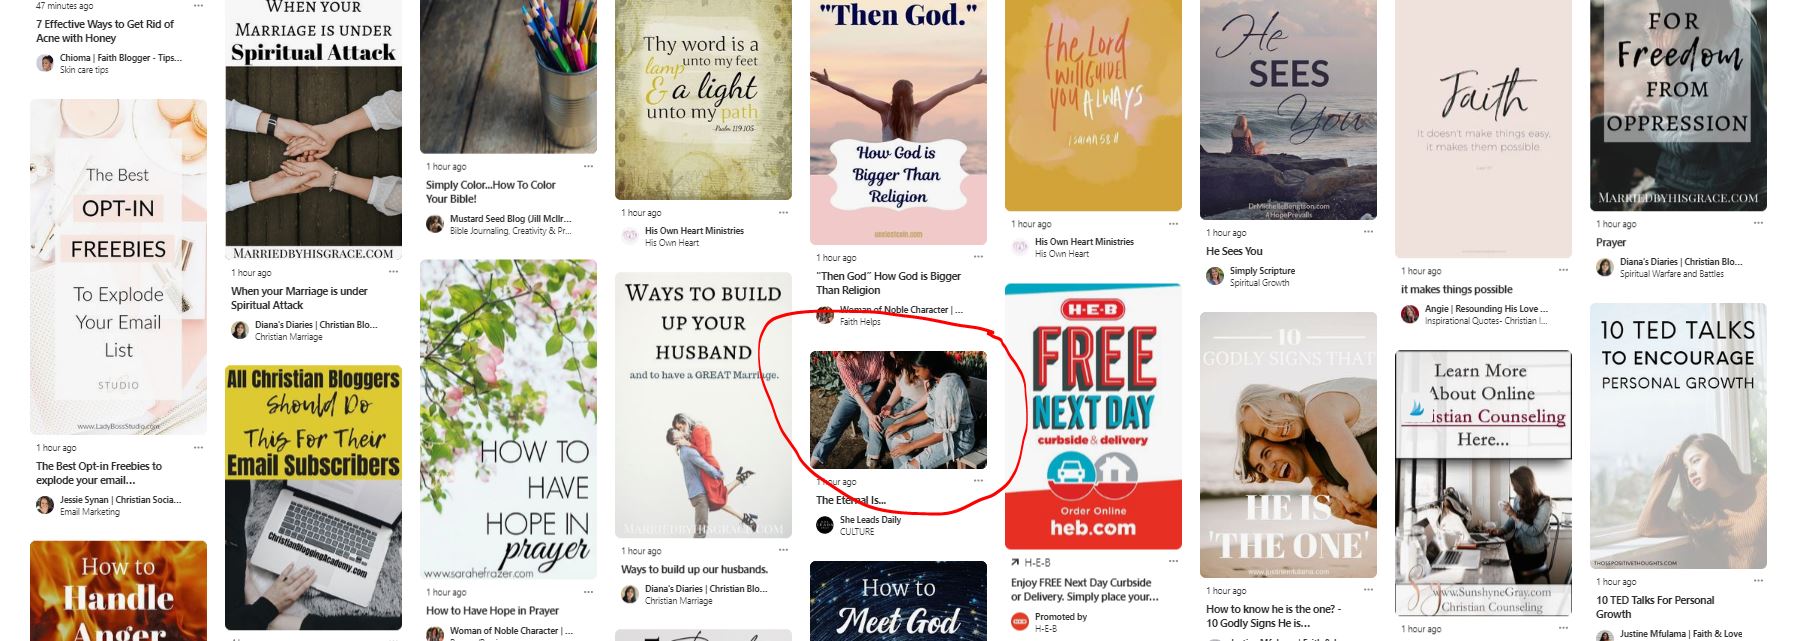
Vertical image – Your pinnable images should follow a 2:3 size ratio. This would include 600 x 900, 735 x 1102 (the Canva Pinterest template), or even 600 x 1200. Just keep in mind that the longer pin images could get cut off in the feed, especially for mobile users. Avoid using smaller rectangular or square images as they can get overlooked in the feed. You can see the smaller image below and how it can easily be scrolled past in this feed of other longer pin images.
Blog Post Title – Of all the Pinterest SEO tips I can offer, this one would top the list! If your pin leads to a blog post, your pin needs to make that clear. Having the blog post title, or a variation of it, on the pin is crucial for letting a reader know this pin leads to the actual content. Simply writing out a Bible verse or quote might get the pin saved to a Bible Quotes board, but it won’t be helpful in generating actual clicks through the pin to your blog.
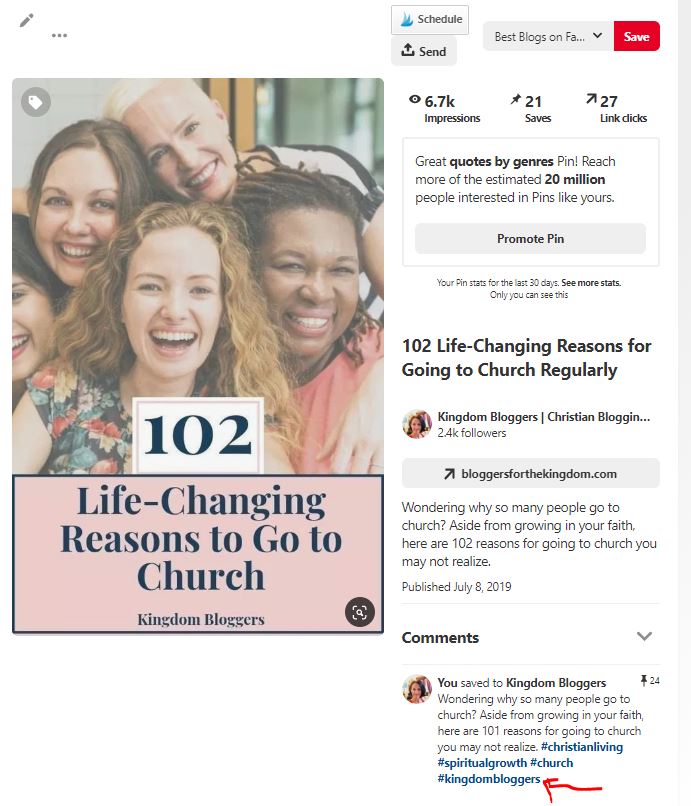
Pin Description – By default, when a pinner pins your image, whatever you’ve entered into the Alt Text block for the image will display as the Pinterest text when they add it to their board. This description is not at all optimized! It is important that you write a keyword-rich description (using complete sentences). Do not, however, put all that into the Alt Text block! You can do it manually or use a Plugin such as Tasty Pins (which is what I use). In the image below, you can see the additional box that Tasty Pins adds so you can place the correctly optimized pin description on the pin image.

Hashtags – Hashtags actually became a “thing” for Pinterest in 2018. You should add a handful of relevant hashtags to your pin description for all new pins that you create. The hashtags only work for new pins being added, so don’t worry about going back to the pins you’ve already added to edit them for hashtags. When you use hashtags, these will be clickable on the bottom portion of your Rich Pin information. When deciding which hashtags to use, I usually think of the boards that this particular post should be pinned to and will use hashtags that match the board names.
I would also recommend adding a hashtag for your blog like you can see on the pin below. This way a pinner can click on it and find a whole page of nothing but more of your pins!
3. Pin Quality Content from Other Accounts
It is really important that you aren’t just pinning your own pins to your boards. Pinterest will view your account as a “quality” account when they see you pinning quality content from others to your boards. So what constitutes a “quality” account? While it is ok to occasionally pin images that aren’t necessarily optimized, the majority of pins should be. That means they are rich pins, have a keyword-rich pin description, and are just really great, visually-appealing images.
I recommend finding some top pinners in your particular niche and following them. Then you can click on the “followers” tab and you’ll see all of their recent pins. From there, you can just pin them or schedule them via Tailwind. You can also make regular visits to your favorite blogger’s Blog Board and pin/schedule from there.
Pin Only to Relevant Boards – You should have already gone through and cleaned up the SEO for your board titles and descriptions. Make sure that the pins you save to them follow suit. With the exception of your blog board, the rest of your boards should only contain pins related to the keyword for that specific board.
Summary Pinterest SEO Keyword Locations
There are some key places that you’ll want to ensure you are using your SEO keywords. This will help the Pinterest algorithm – and other pinners – to see yours a quality content.
Profile Name – While it is totally OK to have your profile name be your actual name or your blog name, it is important that you get some keywords in it as well. You can easily do this by separating your name and the keywords with the divider symbol (or even a colon). You’ll most likely need to do this from your mobile device because, for some reason, you can only have so many characters when doing it from the desktop version. Just go to your settings from your mobile device, make the changes, then log out of your desktop Pinterest account and log back in.
Pinners can search for content by profile. When they type in a search term, they can then click the “people” option in the dropdown menu. This will give them results for any profiles with that specific keyword phrase in it. This is why it is really important that you add a keyword or two that might be the most common term someone would use to find what you mostly write about.
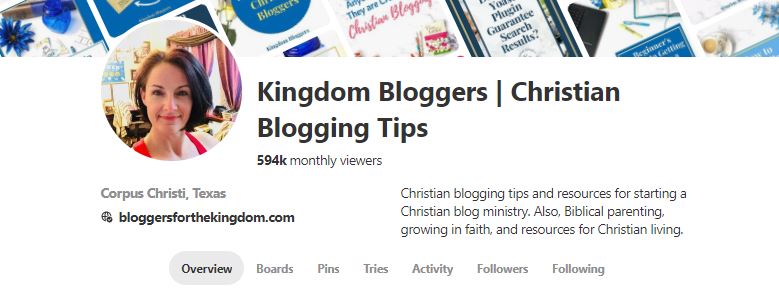
Profile Description – Instead of just saying something like “coffee addict,” use the description space to add some important keywords to be associated with your profile. You can see mine in the image above.
Board Titles and Descriptions – Pinners can search by board so it is crucial that your board names be terms that pinners might actually search for. Additionally, your board descriptions should be keyword-rich – complete sentence – descriptions. Avoid keyword-stuffing them with hashtags or single keywords.
Pin – You should also include your SEO keywords to your actual pin image. This includes having a main keyword in the wording on the pin (such as your blog post title which should already have SEO applied to it). In addition to the visual part of the pin image, you’ll want to include the SEO keyword(s) in the pin description and as hashtags.
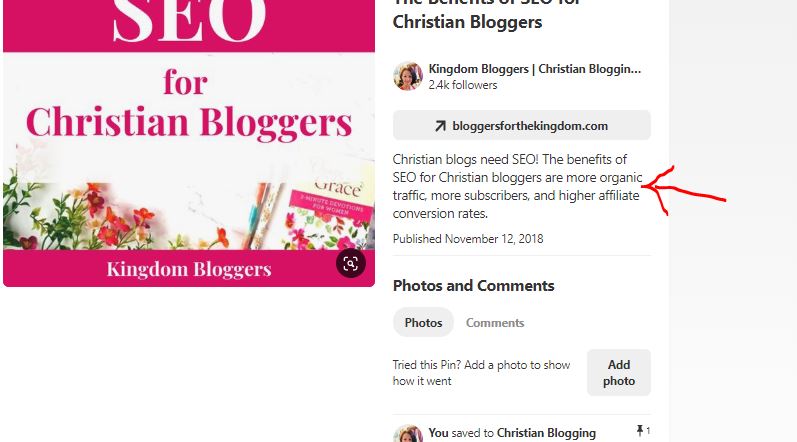
Blog Post – When you have rich pins enabled, the Yoast meta description for the post display at the top of the pin sidebar (see below). Ensuring that you are writing good quality blog content (using blog post SEO), will give the pinner a glimpse of what the post is about – which may entice them to click through to read it.
Where to Save Your Pin First
There is much debate on this particular question. Some will say you must first save the pin to the most relevant board (by keyword). Others will swear by saving it first to your blog board. Here’s the deal. You need to determine what works best for YOUR account. Whichever method you choose to go with, just be consistent with that method. While Pinterest does make changes constantly, the idea of “consistency” has never changed. And one thing it does not like is to make sudden dramatic changes. So if you are pinning to your blog board first (or the relevant board) then don’t suddenly start pinning to the other one first.
No matter which Pinterest courses you may have taken, please do not be tempted to think their way is the only right way. While there are some foundational aspects to how Pinterest works, much of it will vary between individual accounts.
- Pin to Blog Board First – This is the method I’ve used with all of my blogs and have always done very well with it. Once I’ve published a new post, I will visit the post as a visitor and pin it directly to my blog board. From there, I will then schedule it, using Tailwind, to my relevant boards and relevant group boards.
- Pin to Relevant Board First – For this method, you would simply pin from the post to the most relevant board for the topic of that blog post. From there you can then schedule it out to your blog board and other relevant boards using Tailwind.
**When using Tailwind to schedule out a single pin to multiple boards, be sure you use the interval setting and space the pins out by at least 24 hours each. Otherwise, the pin will go out at once to all listed boards and your account may be flagged for spam.
[bctt tweet=”Need help with understanding Pinterest SEO for your Christian Blog? These tips can help.” username=”kingdomblogger1″]
Your Pinterest SEO Strategy Matters!
Pinterest is a Christian blogger’s best friend when it comes to sending consistent organic traffic to your blog. But it only works if your blog and Pinterest profiles are properly optimized for Pinterest SEO.
Don’t think you need to get this all fixed in one sitting! Take it a little bit at a time. Work on your Pinterest profile first, then start making the small changes to older pins on your blog. As you publish new content, simply create your new pinnable images with these Pinterest SEO tips in mind.
This post was meant to give you an overview of what it takes to improve your Pinterest strategy. But this will only get you so far. When you are ready to take your Pinterest to the next level, I highly recommend Pinterest Ninja. This was the very first course I ever took and the only one I ever recommend.
Megan is amazing (and a Christian herself) and stays on top of all the latest Pinterest and Tailwind changes so you aren’t left wondering what to do.
Be sure to also read:
